Wednesday, February 29, 2012

The question of what the yard will look like has been answered!


Well with some snow on the ground finally, so I spent the evening here in the house coming up with different ways of making a yard.  This evening I also cleaned and took stock of all my usable track:

  • 4ft diameter curves- 9, one permanently attached to a switch.
  • 1 foot straight sections- 4
  • 2 foot straight sections- 2
  • 3 foot straight sections- 3
  • LH R1 switches, 3 one with a curve piece permanently attached.
  • RH R1 switches, 2
This comes out to approximately 9ft of curved track, 17 feet of straight track, and 5 switches.

So with that in mind, I began to design the yard which will serve as the hub of the railroad.

Things I wanted in the yard were:

  1. A freight house.  The freight house is an old bird house, but with some fixing up, it will work great. 
  2. A place to get water and coal.  I have a water tower, but now I am in the quest of finding a suitable container for fake coal.  I won't need a tower, but an old hopper of some kind would work great.
  3. A mill, or at least some place to store logs.  This railroad doesn't use water to haul the logs to the mill since the terrain is easier for trains than some places.  The trouble with hauling logs via water is that they get hung up in all sorts of places, so a railroad might actually be cheaper.
  4. A platform of some sort for passengers.  With one passenger car, and at most two more coming, I don't need anything fancy, but a simple 2X4 painted well might serve the railroad's "passengers" good enough.
So with those thoughts in mind, I set out to design a simple yard, and here is what I got:

 Cat for size reference.
 Three switches provide most of the track age I need.  The spur in the lower middle of the photo will lead to the mill.  The tow track pieces running parallel in the middle of the photo will hold the freight depot, platform, and water tower.  The only thing I might change about this is I may add a spur to load/ unload cars as well as put them on and take them off the layout.


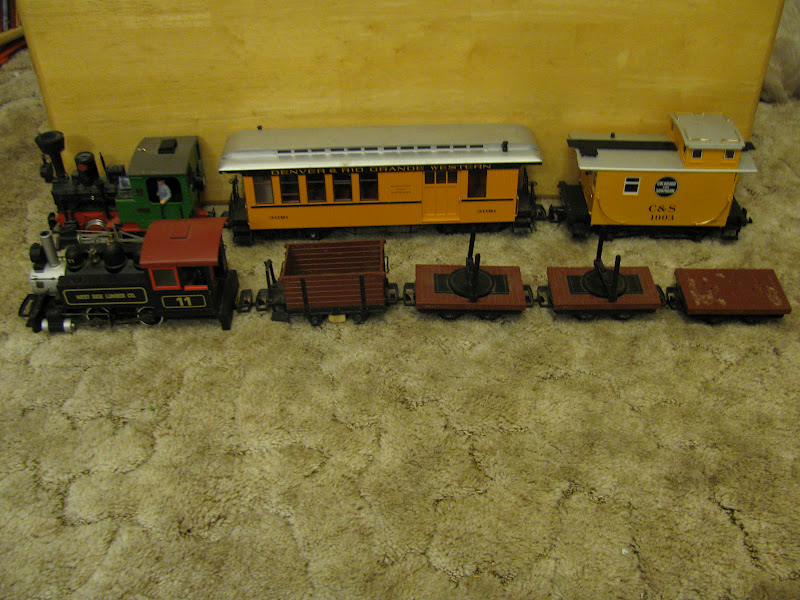
As you can see, the brass after being cleaned, polished, and fixed is all shiny.  The ties for the most part are okay, with only a few joints missing.

Based on what I have now, I only need at a minimum of six-eight more curves and 9-11 feet of straight track.

Cleaning a car.

I plan to make this thing an annual project, cleaning cars.  Each car on the STL will have to be cleaned and tested at least once a year plus service as needed.  The importance of cleaning is often underestimated.  Cars that are dirty, have misaligned wheels and broken couplers do not operate well, so it is important to keep cars free of dirt, wheels in good condition, and coupler mechanisms that operate reliably.  Here I will show you my method of cleaning a caboose:

 Step 1, assess the car.  This caboose had several things wrong with it that I didn't like:

  1. Broken parts.  The plastic handrails, ladder, and under carriage all had broken pieces.  this is a very old piece of rolling stock (about 13 years old by now) and has been used and abused.
  2. Dirt, the sides, inside, and under carriage all had loads of dirt and grime on them.  this needed to be cleaned off.
  3. Wheels and couplers not lubricated.  The wheels are plastic, so I will probably replace them in the near future with metal wheels along with most of the "regular service" cars.  But that is another topic which I will save for later. The couplers also needed to be lubricated with some light oil.  Be sure to use oil that is plastic compatible and do not use too much of it.

 Step 2, pull the car apart.  the only parts I needed to separate was the roof and the ladder on the side.  As you can see by the photo this caboose has a lot of dirt in it on the inside as well as the outside.  Though dirt would have been okay on small lumber railroads, no one tolerates this much on the INSIDE of the car, where the crew sleeps.  Also, notice that the door on the left is slightly ajar, that is because a spring to hold the door shut is missing and will need to be replaced too.
Here is the handrail parts.  There were so many parts broken on this that I decided to replace all of the hand rails, with the exception of the ladder.  But that is for another day when I talk about REPAIRING A CAR.

 So here is the handrails removed.  the handrails that are left are the shiny brass ones long the sides of the car.
Step 4, clean the car.  With only water, the car got cleaned.  For RR cars this big I use the bath tub.  Be sure to clean off all the dirt that the cars leave in the tub otherwise your whole family will be giving you bad looks.  The water was warm water coming out of the shower head.  I used a paint brush too brush the little corners on the inside and polish the outside.  Now this car is good for the summer and will probably be cleaned i nthe fall.  A note for the under carriage, try to be careful when using the paintbrush there, some parts on the underside are fragile and don't tolerate harsh scrubbing.  But the results are pretty good, all that is left is to make new hand rails this weekend.

Rolling Stock and Motive Power

The heart of the railroad is in the cars and engines that transport goods.  On the Smokey Timber Logging Co. the rolling stock fleet is some what small, with less than 20 cars total.  However, for logging operations each car is essential.  Sure there might not be a lot, but each car is put into service and works in key positions.  The two engines on the line, a German Stainz locomotive and an American porter saddle tank locomotive work in tandem to haul the logs from the logging camp down to the mill.


  • Back row, left to right:  LGB combine passenger car of the DRGW, LGB caboose of the C&S, and a Playmobile ballast car.
  • Center row, left to right:  Bachmann 0-4-0 porter saddle tank engine of the West Side Lumber Co., LGB short gondola car that has been converted to a track cleaning car, and the LGB Stainz Locomotive.  I haven't figured out a good excuse for a German locomotive to be on an American logging railroad.
  • Front row, left to right: A spare logging car and the trailing car, pair #1 of logging cars, pair #2 of logging cars.  I will always have these pairs in tandem as the logs stretch from one support to the other.

Here are the two typical consists.  The back row is a typical STL passenger train.  The combine will haul baggage and up to 16 passengers while the caboose will hold extra baggage, mail, and the train crew.  This is perfect because the line is small, however more passenger cars  will join the railroad soon.

The front row is a typical logging train.  Due to the heavy load of the logs and the small horsepower of the porter, logging trains will be short with only one pair of logging cars.  The short gondola in the front will haul extra coal for the engine and any tools needed by the logging crews.  The trailing car is meant to protect the "over hang" of extra long logs.  That way while in a yard, the engine can couple onto the back of the train with ease.

A page dedicated to rolling stock will be in order once all of the cars have been cleaned, tested, approved, and cars yet to be seen are added.  So by about May we should see a rolling stock page.

Friday, February 24, 2012

Disaster

Well, I was talking about building a 4 foot long trestle to cover the ravine i created.  Now, after testing it I have found that there are several structural problems with it, and after leaving it outside to let he wood get used to the climate, I have found that a simple wind has knocked pieces off.  so I have decided to scrap the trestle idea and leave it inside for display instead.  The broken pieces are fixable, but the trestle obviously is not durable enough.

So now what do I do?  Well, to close the 4 foot gap is out of the question as that provides drainage and a place for over spill to leak out of the pond so some sort of bridge must cross the ravine.  I do have a covered bridge, and I also have other "scrap" pieces of lumber so here is what I have for ideas so far:


  • Make bridge abutments out of real sized lumber such as 2X4s then cross the ravine with the covered bridge.  The bridge is only 20" long though, so I would have to back fill on either side of the bridge, leaving the middle open.  The bridge might look small, but it is prototypical, and gives great photo shots.
  • Create a temporary bridge from scrap pieces.  This would span the whole ravine without the need for back fill and provides a goo long bridge like I had hoped, but I do have one problem with this idea.  considering my last bridge attempt didn't work out, I am skeptical about buildignanother bridge completely from scrap.
Any ideas anyone?


Wednesday, February 22, 2012

Rail clamp shipment

Well my first purchase specifically for the railway has been ordered.  It is a shipment of 10 rail clamps that I will test and review.  These rail clamps are Aritso Craft clamps.  Aritso craft track as I have seen, does fine for a few years, but they seem to not have the most durable reputation.  I figure though that the 10 dollar purchase is worth it to find out if they work O.K.  If they don't work as expected, I'll buy 50 Split Jaw clamps which from reviews sound very good.  If that is the case, I'll simply find a use for the Aritso Craft clamps on track that doesn't need the most reliable track connection, such as the last few feet of the unloading spur, where a locomotive doesn't venture too far in anyway.

At any rate, there is nothing that I can do until the clamps get here.  For those who didn't know, I plan to attach track together with 2X4 scrap pieces.  Screwing track together on that is better than relying on the clamps so I figure that as long as the clamp is able to transfer electricity (it's second purpose from holding the track together) the chap clamps would be fine.

Saturday, February 18, 2012

New stuff has been completed.

Today I have gotten a lot done.  instead of explaining myself over again you can look at the Initial Construction, Checklist, and Track Planning pages for updates, they are all labeled February 18th, 2012.  so go around and look up what I have done if you are curious.

Thursday, February 16, 2012

New thinking and re-arranging some things.

Last weekend I decided that the new track plan for this garden railroad will be a hexagonal shape with spurs leading off  the main line.  I also decided today that the deck originally by the fence should be moved to the open area in front of the railroad.  this is one thing that I did today, and everything seems to be looking better.  One other thing is that I thought of a neat way to lay track.  Here is what I propose:

  • Each joint has a pair of rail clamps to keep the electrical current steady and unbroken.
  • Each joint is also connected to a main bus wire system, which will allow for plenty of electricity throughout the railroad.
  • Each joint is secured to a piece of 2X4 with screws allowing for support to the track, allows a place to secure the wire joints, and provides a place where I can level each piece of track so that the railroad is sitting with a smooth, level, roadbed.

Monday, February 13, 2012

new plan

O.K.  so the track plan that I thought was final has changed once again.  Before, I was thinking about a square or rectangle track plan.  now, after adding the mountain footprint, I see that a hexagon would be more appropriate.  I as of now have not tested it out, but I will do that before the sun goes down.  anyways, here is what I was planning:


Four sides of 4' straight legs, all parallel and opposite.  Two dies that are two feet long, opposite each other.  A small yard of three switches which make a passing siding and a long spur for unloading cars.  And all the other elements remain pretty much unchanged.